Bouquets & brick bits
Add structure or style to your garden landscape inspired by these six inventive ways with the humble brick. Words and Photos Mark Rayner
Reusing old bricks in the garden has long been a popular way to add instant appeal to an outdoor space. Whether it’s a simple mowing strip around a lawn, a meandering cottage-style path or an impressive purpose-built raised bed, reclaimed bricks not only associate well with a wide range of house and garden styles, they’re also environmentally friendly, contrast beautifully with surrounding plants, and inexpensive to boot.
Getting the edge
One of the simplest ways to use bricks in the garden is for edging, perhaps containing the gravel within a pathway, defining an area of planting or demarcating the shape of a lawn. This can be as easy as embedding the bricks end to end in the soil to create the desired ground pattern or, for something a
little more permanent, they can be cemented into place.
To create a mowing strip, bricks should be laid side by side and positioned just below the level of the lawn. Use a string line if creating straight edges, or a bottle with sand (or proprietary spray paint) to mark out a curving organic shape. Dig out a shallow trench a little wider than the bricks and then compact the
soil (an upright fence post is good for this) before laying the bricks in position, mortaring each one in turn. Once dry, refill any gaps around the bricks with soil or cut turf.
Paving the way
Bricks are synonymous with paths, paving and patios, and can be laid in a variety of patterns for decorative effect. The simplest and most adaptable is ‘running bond’ where bricks are laid end to end in a line, with each joint spanned by the brick on the next row – this is the most common pattern for building walls and translates just as well into paving, requiring minimal cutting of bricks. It also works well for curved paths where a more complicated pattern may be impractical. Other paving patterns include the relatively simple ‘basket weave’ (where two bricks are laid side by side and the next pair is turned 90 degrees) and the more complex ‘herringbone’ (the familiar zig-zag pattern of bricks laid at right angles).
Again, simple brick paths can be laid directly onto compacted and levelled soil or mortared into place. A quicker and easier option is to lay the bricks and then spread a dry mix of sand and cement across the paved area, sweeping the mix into the cracks between the bricks – this will harden with the residual moisture forming a solid surface. If laying a larger area of brick paving, perhaps for a patio, ensure you
have a suitable flat and level compacted base course (usually 100mm) or simply lay the bricks directly on top of an existing concrete pad or path.
One thing to consider when designing an area of paving is whether you want a ‘directional’ pattern (such as ‘running bond’ or ‘herringbone’), which is good for a path where you want to encourage people to walk, or whether a ‘static’ pattern (such as ‘basket weave’) might be more effective – perhaps for a more restful area such as a patio.
Structures
Reclaimed bricks can be used for all manner of practical garden structures such as low retaining walls, steps and raised beds as well as more decorative features such as benches, plinths and water features. Remember, when constructing with bricks ensure there is a sufficiently stable base (even a low retaining wall will benefit from a concrete footer below the soil level) and be generous with your materials – for maximum strength and stability always use a double row of bricks for low walls and raised beds.
Whatever you’re building, you’ll probably need to cut a few bricks to fit. Some older terracotta bricks are surprisingly soft and can actually be sawn with a handsaw (buy a cheap one specifically for this purpose), or use an angle grinder with an appropriate concrete cutting blade – just be sure to wear safety glasses and ear protection.
6 winning ways with bricks
Brick planter
Consider building a brick planter as a cheaper option to a large glazed pot. Again using bricks and mortar, build a rectangular, square or circular planter in situ. Once the mortar has dried, fill with good quality potting mix and some potted colour.
Brick plinth
A brick plinth makes an ideal base for a sundial or a potted plant or can even be used to display a piece of garden sculpture. Ensure that it’s built on a stable foundation such as a sunken concrete footer or buried concrete slab, and use a spirit level throughout construction to ensure it remains plumb and level. Finish off by mortaring a suitable concrete paver on top.
Brick bench
In the same way, build a rectangular ‘box’ using bricks and mortar and, once the mortar is dry, fill with sand or earth before bricking over the top – a comfortable height for a bench is approximately 450mm.
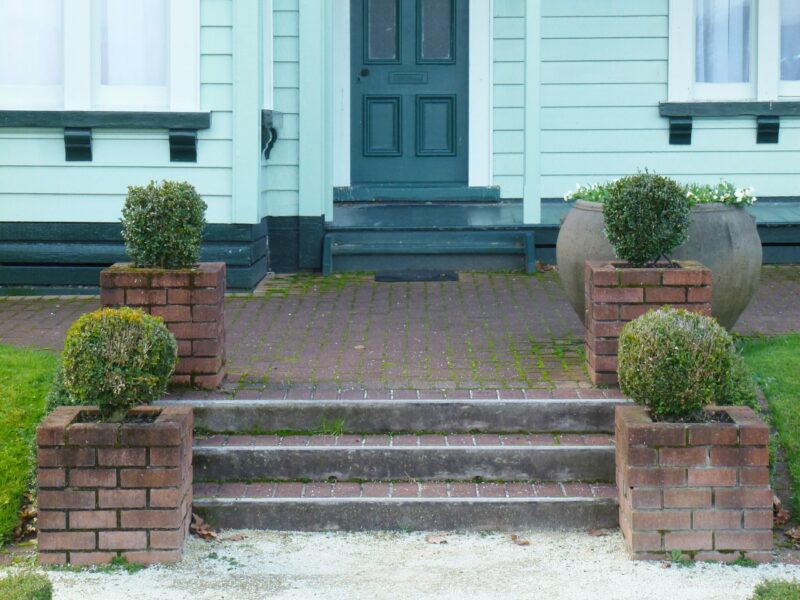
Brick steps
Create simple steps by constructing a series of low rectangular forms from mortared bricks and then fill each of these with gravel.
Water feature
A raised brick pond looks fabulous but may be difficult to keep completely watertight. As a simple solution, start with a large sturdy concrete container (such as a cattle trough) and clad this with bricks, finishing off with a row of bricks around the top to create a rim.
Sunken garden
If you’re up for a challenge, a sunken garden is a great way to introduce a change in level in a garden and reclaimed bricks are perfect for building the outer retaining walls, steps and central path. Good preparation is key with time well spent in planning and during excavation and construction. Again, make sure walls are sturdy and safe with appropriate footings, and use string lines and a spirit level to ensure everything is upright and level.
Keeping it safe
• Avoid siting brick paving in shady or damp areas as the bricks can become dangerously slippery underfoot. In this situation it may be better to use brick-edged gravel instead.
• When cutting any bricks be sure to wear safety glasses, ear protection and a dust mask.